Showing posts with label Prima Marketing. Show all posts

Wednesday, September 24, 2014

'Perfect Memory' layout by Marta + VIDEO tutorial

Hello there,

It's Marta here today. I am back with new layout for September and video tutorial.
To create this project I used Prima and  Bo Bunny Paper Pad.
To create backround I used Prima stencil and sprays from Lindy's Stamp Gang.

Some beautiful embellishments are flowers from Petaloo,  Wood Flourishes Clam Shell
and Petaloo Paper Doilies.


I added some mosaic glass stones and mini shells. As for final touches I added summer chipboards.

Here is a complete step by step tutorial created specially for you.
I hope you will enjoy it :)


Marta xx

Thursday, August 28, 2014

Celebrate Love- Wedding Card by Sylwia

Hello Arty Souls!!!

This is my extra project for August. I was going for my friend's wedding and decided to make a card for her:) In my opinion, it is always better to give something hand made:)

I used following materials:
Metal Paper Clips
Prima Trim Flowers

Firstly, I distressed edges of Tim Holtz paper, then I added some doilies from my stash


I also added ink to the flowers


I hope you enjoyed it!
See you in September!!
Love,
Sylwia

Thursday, August 21, 2014

Spool Plinth Halloween Bottles

Hello,  

Mandy here sharing a Halloween themed project for August.

I created this project by altering a large wooden spool, altered with Lindys Stamp Gang Embossing Powder in "midnight copper", black lace by Papermania, sprayed white lace with "squeezed orange" by Dylusions.


The box part was created with thick cardboard/chipboard, I made a box that measures 4.5" x 2" x 3".
I painted both sides before I glued it together while flat with black craft paint.  I used Graphic 45's "An Eerie Tale" to cover both sides.  I created a scallop edge for the bottom with some purple paper from this collection too and a top pelmet with covered chipboard using  the "ornate" large die by Tim Holtz.


The top was covered with Prima flowers, a clock paperclip also by Prima and a skull.  The inside was done by filling a large glass bottle with a broken up skeleton and by colouring some Glossy Accents with "fired brick" Distress Ink reinker.  This was dripped over the bottle for a bloody effect.  I also filled a small bottle with the reinker.  I layered over paper labels using the embossing powder and tags from the paper collection.  Some black lace was used along with black gems to embellish.

I hope you liked this project and it inspires you to start your Halloween preparations.  Thank you for looking.  I have included a video on the kit I played with for this project so you can see the product that is available in the Cardz'n'Scrapz shop in more detail.

Mandyxx

Sunday, August 17, 2014

Vintage set by Marta

Hello guys,
It's Marta here with my next August inspiration.

I am gonna show you today my vintage set. I created a card and a tag from beautiful Graphic 45 Paper pad 8x8 An Eerie Tale.
I added beautiful paper Prima Flowers.

"Thank you" wording is created on the computer and printed.
I also added some lace from my stash. White doily is made with new die cute from Prima.
The other doily seen is actually fussy cut from Prima Flowers packaging. Often times packaging is as beautiful as actual product in the box.

This tag also contains some packaging. You can easily see it on the top part of the tag. Those small dots are made with my favourite liquid pearls. Wording is from Kaisercraft clear stamp 'Today'.


I hope you liked my vintage creations. I also hope I encouraged you to use some packaging.
Sending you lots of creative hugs,
Marta xx

Thursday, August 7, 2014

'Smile more' scrapbooking layout by Marta

Hello there ;)

It's Marta here with my first August inspiration for you.
We have received some fun kit ths month. Orange colours and Halloween theme.
Paper used as my base is from Tim Holtz Idea Ology.

You can see some sewing, great way to build up your backround on the page.
The butterflies are embossed with Lindy's embossing powder.


I added string from my stash, it's my recent favourite embellishment. 
Small dots are made with liquid pearls.


Cute music note is from Prima lyric shaped paper metal clips.
Yellow modeling paste was mixed with Lindy's Stamp Gang magicals. These are wonderful powders that could be mix with water, paste etc.


I hope you have enjoyed my work. If you would like to know how to create mixed media page like that here is link to my previous work with video tutorial.

Sending you hugs,

Tuesday, August 5, 2014

Altered frame by Sylwia

Hello Arty Souls!

I am still in a summer mood, summer colours and flowers!!!:) And I wanted to use a print with one of my paintings- a little fairy girl called 'Shine'


Today I wanted to show you my altered frame, which I decorated using August fabulous kit:


Art Supplies I used:
Metal Paper Clips
TandiArt Fairy Girl
Vintage Music Sheet

I created the background with acrylics, oil pastels and I also use embossing powders with stamps.
I added paper flowers, metal paper clip and cheese cloth dyed with ink sprays.


The girl is a print of one of my paintings


I hope you enjoyed the project

Love

Sylwia
xx

Friday, July 4, 2014

Mixed media Tag by Marta

Hello friends,

It's already July and holiday time ! For many of us it's time to relax and create :)

Today I would love to share with you my love for mixed media.
In visual art mixed media refers to an artwork in the making of which more than one medium has been used. I have mix few mediums today: gesso, gel medium, silks 6pk Autumn, inks and sprays.


The base is made with a tag from Prima.
The girl is a Prima wood doll for mixed media. Flowers and leaves are also from Prima laser cut embellishments. All of above was painted with silks.


The wording is from Cosmo Cricket Tiny Text stickers.


I hope you have enjoyed my mixed media creation. I know that for many crafters mixed media is still new and scary to try. Trust me once you will get some paint on your hands, make few splashes you will fall in love with this technique just like me :)


Sending you creative hugs,


Tuesday, June 24, 2014

Mixed Media wooden chest by Marta

Hello my crafty friends :)

It's Marta here with my special June project.
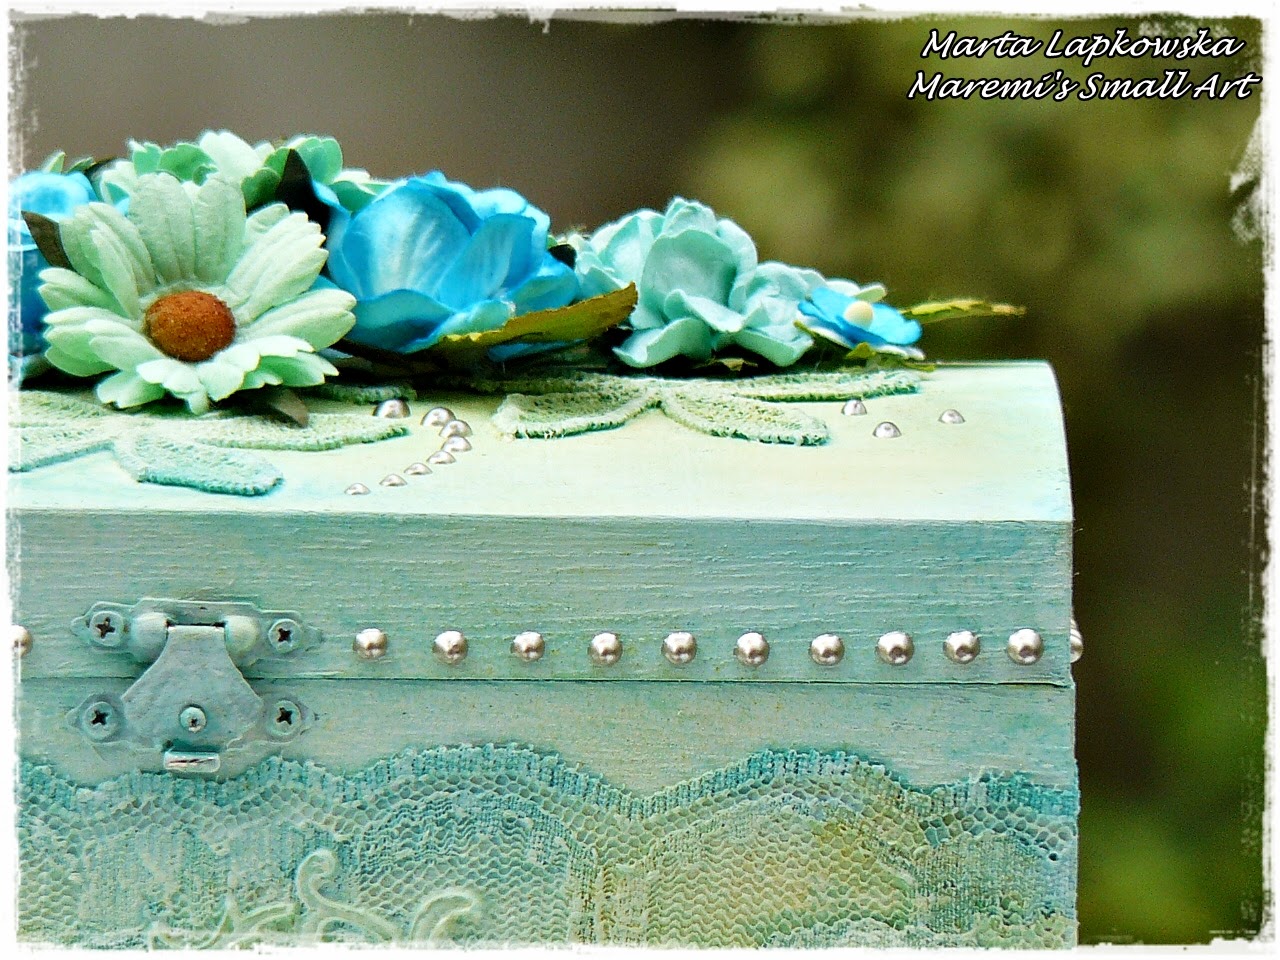
I wish to share with you off page creation - an altered wooden chest.
My box came to me as a part of my design team pack for this month. It was quite challenging as I usually work on flat surfaces like canvas or papers. I have to say I enjoyed this journey and I am very happy to share with you my finished box.
Here it is :)

As you can see on the top part of the box there are some Prima Trim White Petal Flower lace.
I also added lots of paper flowers from my stash.


The shiny dots are made with liquid perals (Platinum Pearl) from Ranger. It's a great addition to all projects.
I use liquid pearls for my cards, journal pages etc.


Sides of the chest are covered with some lace and stencil.
The whole box is sprayed with mists from Lindy's Stamp Gang. I used 3 colour mix - 'Golden Sleigh Bells', 'Tilt-a-Wheel Teal' and 'Merry-go-Round Green'.

I hope you have enjoyed my special project for June. If you didn't see my other June works please click here in the links to see my art journal page and classic cards.

Hugs, Marta xx

Friday, May 23, 2014

My Vintage Angel- mixed media painting by Sylwia


Hello Arty Souls!

This is my second project for May. I decided to incorporate  this divine vintage kit into my mixed media painting. I love creating whimsical girls, fairies and angels so there it is My Vintage Angel:)

Art Supplies used in the project:

Acrylic Paint
Texture Paste


I started off by tearing pieces of paper by Tim Holtz and gluing them to the background. Than I outlined my angel and painedt the background using old credit card. It is more scratching than painting but trust me I didn't use any brush in this painting. I 'painted' it only with plastic card. That is why the texture looks uneven and grungy.
The same technique I used to paint the face and hair...


I decided not to cover whole background with paint. I love this butterfly/moth:) 
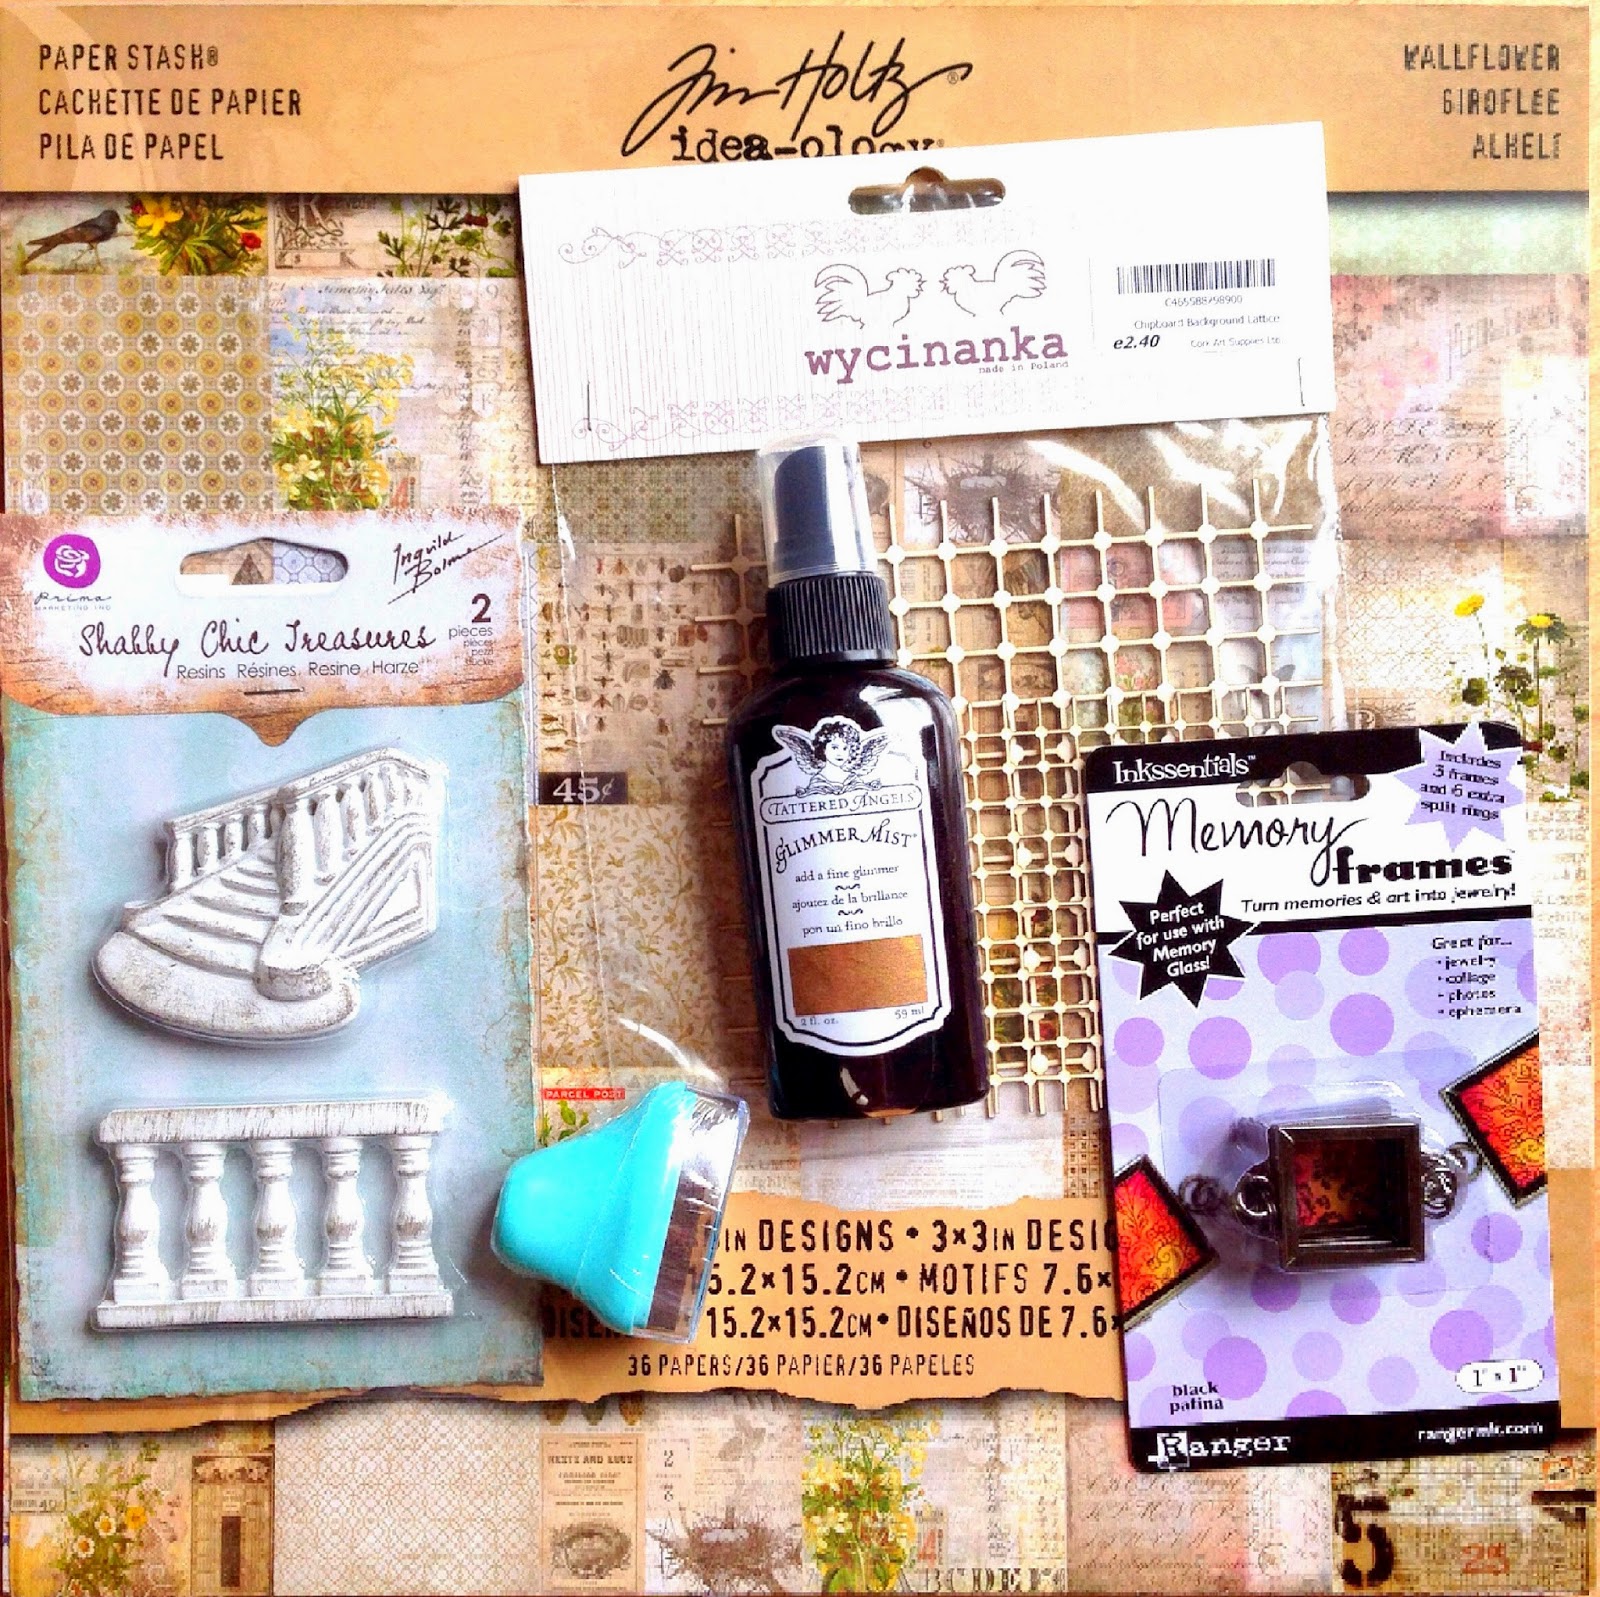
I also sprayed the pieces of chipboard background lattice with  glimmer mist and glued it to the background. It is hard to see it on the photo, but this mist gives beautiful gold shimmer effect:) Love It!


And I used Memory Frame to make a necklace for my angel. I cut the inside of the frame and a heart out of piece of cardboard, which goes with a vintage theme:)


As for wings I decided to use texture paste and stencils:) And also I decided not to cover the dress with paint completely, as I wanted beautiful papers to show through.


I hope you enjoyed this project:)

xx 
Sylwia


Monday, May 19, 2014

Vintage layout by Marta

Hello my friends.
It's Marta here with my second May project.
I would love to share with you my vintage layout.

As a base for my layout I used beautiful paper from Tim Holtz Idea Ology. The lovely roses that you can see where originally on the paper. I tried to show the beauty of the papers by not covering it but to integrate it with my design.


The whole layout is stiched around by sewing machine. 
I also used stamping and stenciling on the backround.
All the paper pieces were inked on the edges. 
Under the flower you can see Chipboard Backround Lattice. I covered it with Prima Chalk Edger.
Added flowers were from my stash. The butterfly was cut out from the same paper. This is a great idea if you don't have much embellishments. Try to find on the papers some designs that could be cut out and used as your very own embellisment. Here is the photo of those paper butterflies.


Another stunning addition to the project was Prima Marketing Shabby Chic Treasures Resin Railings. I distress it with black ink and Prima Marketing Chalk Fluid Edger Pad Dark Rust.


I hope you have enjoyed this project. If you didn't see my vintage cards please check them out here :)
Love, Marta x


Friday, May 9, 2014

Altered wooden house by Sylwia

Hello Arty Souls!!!

And this is my favourite month in a year- May - with blooming flowers and singing birds. This project has been inspired by my house, my garden and....my new guests - little birds, which built their nest under my roof:)
I just love spring!!!


y


Lovely May Kit


Art Supplies used in the project:

Paper flowers by Prima
Vintage music sheet
Acrylic Paint
Gelatos

I was recently working with those wooden houses, which I ordered in a place where they can cut wood in any shape I want:) Wood is one of my favourite surfaces to paint on. Firstly I adhere pieces of beautiful paper by Tim Holtz, than I added a little bit of blue acrylic paint. I distressed the edges with chalk fluid edger pad, which I love not only for the edges but, as you can see below, I used it to stamp a pattern on the roof :)


I added paper and paint to all sided of the house and I chose a front of the house for main design.


I added the resin embellishment, paper flowers and real moss from Polish forest :)


I added some vintage music sheet and words (all distressed with chalk fluid edger pad)


In this beautiful paper pad by Tim Holtz, I found a page with birds. I cut them out, added a little bit of paint and gellatos. I glued my birds to the house using hot glue gun which allowed me to create 3D effect. I also added some sticks and moss from Polish forest.


This house really reminds me about my home, Polish forest and blossoming spring!!!!


I hope you enjoyed it!!!!

See you soon!!!!

Sylwia
xx