Showing posts with label Sandie. Show all posts

Monday, September 29, 2014

Enchanted Garden Book Box Card

Hi! It's Sandie here today and (sadly) I am sharing my last design team post for Cardz 'n' Scrapz. I have loved being on this team and have enjoyed every moment of working with the rest of the team. Alas, all good things must come to an end :) 

 I made a Book Box Card featuring the Enchanted Garden 6x6 paper pad


Supplies:
Enchanted Garden 6x6 paper pack
Ribbon
Embellishments of choice. 

6" x 10.5" piece of White cardstock for the base
5 7/8" piece of medium turquoise cardstock x 4
5.75" piece of white cardstock x 2
5 5/8" piece of patterned paper x 4

For the  book 'pages'
7.5" x 5.5" pieces of cardstock x 2
7.5" x 4.75" pieces of cardstock x 2

Tools
Adhesives - Wet glue and/or Double Sided Tape


1. Place the 6" x 101/2" piece of cardstock horizontally (landscape orientation) on the scoreboard. Score at 5" and again at 51/2"

2. Fold along the score lines to form an 8" x 5" card with a 1/2" spine. 

Concertina fold (mountain, valley, mountain, valley, etc.) the two 7.5" x 5.5" pieces of cardstock and the two 7.5" x 4.75" pieces of cardstock at 3/4" intervals. (Note that the 7.5" x 4.75" pieces are scored and folded across the short length). 

To assemble the book frame take one of the long pieces and one of the short pieces, weave the folds together and use glue on the top and bottom to hold it in place. Once you have all 4 pieces secured set it aside.You will get a much better fit if your folds are precise and even.

3
4

On the front and back of the Book Box Card I layered up the medium turquoise card, the white card and then the patterned paper. On both sides of the inside I left out the white card panel between the turquoise and patterned paper. 

Note: Add  your ribbon to the front and back of the base before adhering the front and back panels. 
Decorate the box as desired. I used Prima flowers, rhinestones, pearls, Papermania bows and other paper flowers. 

And that is it from me :) 
Thank you so much for dropping by
Sandie
xXx

Monday, September 15, 2014

Enchanted Garden

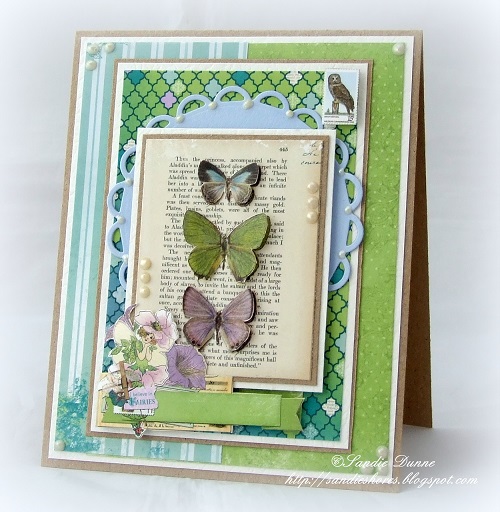
Hi! It's Sandie here and today I have a card to share which features Bo Bunny's Enchanted Garden paper collection. 

These papers are amazing and, with a little fussy cutting, you don't need any embellishments. 


The card is 120mm x 148mm kraft base with a 115mm x 143mm white panel. 

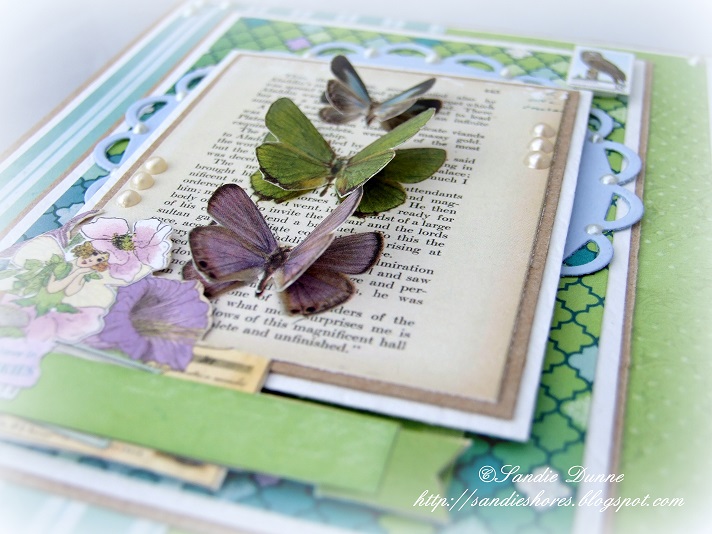
The butterflies on the book page is from one of the papers in the pack. I used the same paper again and fussy cut the butterflies, adhering them just along the bodies so that the wings could stand up. I layered a Lacey Circle between the panels. 


I also fussy cut some flowers on the banner and the postage from other papers in the pack.  Finally, I applied some liquid pearls around the card and on the Lacey Circle. 

Products used:

Sandie
xXx

Monday, September 1, 2014

Every Princess...

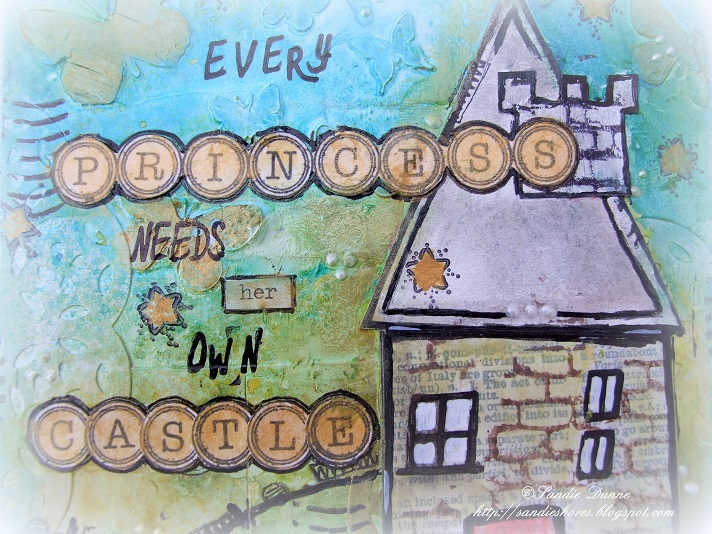
Hi! It's Sandie here with the first post featuring our September DT kit, and today I am sharing a mixed media canvas. 
I covered a 6x8" slim canvas with Bo Bunny's Enchanted Garden papers and whitewashed them with a layer of watered down gesso. I dried it quickly with my heat gun before adding some butterflies with the Prima Butterflies stencil and modeling paste. I then added a kraft doily and gave the whole canvas another layer of gesso. 
I then used some spray inks to add colour. 
I drew some hills with a black paint Sharpie and shaded them with Gelatos - adding some little toadstools with a stamp I had in my stash. 
The house is made from card. I covered the bottom piece with tissue paper and drew the door and windows. Then I used gelatos to colour it all. The title is made up from various different stamp sets - Stampendous Small Typewriter clear stamps, Urban Stamps Typewriter & Bo Bunny Upper Case wooden stamps.
I added some stars and then applied Emperor's gold Silks to a few of the butterflies, the sentiment and the stars. Finally, I applied some liquid pearls around the canvas. 
Products Used:
Slim Canvas
Bo Bunny - Enchanted Garden 6x6" paper pad
Gesso, Mod Podge, Modeling Paste

Have a fabulous day!!
Sandie
xxx

Saturday, August 30, 2014

Enchanting Halloween Tag

Hello! It's Sandie here today, with my final project for August featuring Graphic45's An Eerie Tale 8"x 8" paper pad. If you missed the Paper Bag Album and Halloween Card I made this month you can see them HERE and HERE. 

Today I am sharing a Halloween tag


The tag is 5.5" long and 3.75" wide and I've covered it with a layer of paper. Then I layered on some black lace and purple ribbon before adhering the sentiment with 3D foam dots. I cut a postage stamp and pumpkin from the papers and also adhered them with 3D foam. The flower is from Prima Marketing's Time Traveler collection


I do hope you have enjoyed my creations from the August kit and I hope to see you all again next month for a brand new showcasing of the September Cardz'n'Scrapz design team kit. 

Sandie
xXx

Friday, August 15, 2014

You Bewitch Me

Good morning! Today I have a card to share, which I created using scraps from the Graphic45 An Eerie Tale 8"x8" paper pad. I have already made an paperbag album from this same paper pad (you can see it here) and was a little too enthusiastic with extra tags and photo matts so I am working with off cuts and strips. However, there is still plenty left to work on some cards with.


All of the layers, with the exception of the black doily are cut from the papers. I added a little bit of orange grosgrain ribbon, diecut bat, a metal charm flossed with baker's twine and some black pearls to embellish. The postage stamps are also from the paper pack. 


Supplies: 
Brown & Kraft cardstock
Black Doily
Black Pearls

Thanks for popping by, have a great day!
Sandie
xXx

Friday, August 1, 2014

It's an Eerie Tale...

Hi! It's Sandie here and I'm back again today with the first project for August. I am sharing a mini album I made featuring the divine Graphic45 An Eerie Tale 8x8 paper pad. 

The album is made up of  one 6.25" x 12.5" black paper bag and three 5 7/8" x 11.75" brown paper bags. I stitched them together, down the centre, making a 6.25" square album cover with the pages inside being a little smaller. 

On the front I used Enchanted and layered on some pieces I cut from Magic Spell and Fanciful Fable. I also added some small flowers, die cut bats and a Witch Hat charm flossed with bakers twine. 


The inside pages are filled with tags and photo matts. I used buttons to embellish 


I cut the stamp from the Wicked Whimsey paper


On this page I used black cardstock 5.25" x 10" and folded it in half to make a flap, for extra photos inside. I also added some cut outs from You Bewitch Me, which are held onto the belly band with a Key shaped paperclip by Prima. 


Some more tags and postcards for photos or journalling on. 


Again, I fussy cut a pumpkin from the papers and added a metal pumpkin to one of the tags using twine. 


That's it from me for today. Be sure to pop back regularly this month to see what my Teamies have created. 
Thanks for dropping by
Sandie


Wednesday, July 30, 2014

Discover Yourself

Hi! It's Sandie here and today I have a tag to share, which I titled Discover Yourself. 


The tag itself is from the Julie Nutting for Prima Aquarelle Tag Pad and it measures at 3.5" wide x 8.5" tall.  I covered it, front and back, with Prima's Fairy Rhymes designer papers. 

I stamped the Prima Doll out onto Blending Card and coloured her up with Copic markers. I paper-pieced the dress and headband. 


I cut the butterfly out from the designer papers, added some flowers and pearls and a flossed button to embellish.


The 'Discover Yourself' sticker is from Cosmo Cricket's Tiny Text. 


Thanks for visiting today. Remember, you can also find us on Facebook and we would love to see you drop by and share your creations with us :) 
Sandie
xXx


Tuesday, July 15, 2014

Little Red - It's a Good Day

Howdy everyone! It's Sandie here today with a card I made featuring one of the fantastic Gorjuss stamp sets. This one is called Little Red. 


There are 10 pieces in total in this set, including the green leaves and apples on my card. I stamped Little Red onto Colouring Paper, using Memento Tuxedo Black ink, and coloured her up with Copic Markers. Then I trimmed her out and adhered her to the card with 3D foam dots. 


I also coloured the leaves and apples with Copic Markers. 

The papers are from Basic Grey's Highline 6x6 collection. I've used white, red and green cardstock and layered a 4" white doily under Little Red. To embellish I added some cherry blossom flowers, leaves, a tree, some rolled roses and 5mm self adhesive pearls. I stamped out the sentiment, cut it at an angle, and curled up the end with a bone folder. 


The inside of the card is designed to coordinate with the front and I've also stamped a portion of Little Red, leaving her uncoloured. 


You can find Little Red and the rest of these Gorjuss girls HERE. And don't forget to check out the new products in store, you can find them HERE

Have a wonderful day
Sandie
xXx

Wednesday, July 2, 2014

Fabulous!

Good morning! It's Sandie back again today with a little something I made featuring Ariana, one of the Prima Mixed Media Wood Dolls and the Aquarelle Prima Tag Pad. 


I prepared the tag background by layering on some Prima papers with the edges inked. I took the Prima Checker Stencil and applied Brushed Corduroy distress ink with a sponge dauber and then applied gold embossing paste through the Prima Crackle Stencil. 


I simply coloured up Ariana with copic markers and added some Love Struck silks, from the Goodnight collection, to the shadows of her shirt. I layered on some lace and ribbon before adhering the doll and handbag accessory with 3D foam. 


The FABULOUS sentiment is from Heidi Swapp's Buzz Words Epoxy Stickers. To embellish I used some Prima Flowers, gold pearls and Tim Holtz Filmstrip. 


Thanks again for dropping by and have a great day!!
Sandie
xXx

Tuesday, July 1, 2014

Sister-In-Law Greeting Card

Good morning and happy July 1st! The school holidays are upon us and the sun is shining... ahh, bliss! Nothing beats doing a little crafting to the sound of happy kiddos in the garden ;) 

Today I have a card to share. I love the Prima Dolls stamps but find them a little bit large for my cards so on my card today I have only used the top half of her. First I cut out the oval, from Perfect Colouring Paper, using a Spellbinders oval die. Leaving the die in place, I stamped the image as this leaves a white border all around the edges. 


I coloured her up with Copic Markers and matted her onto a white and larger pink scalloped oval. 


The papers I've used are from Basic Grey's Highline 6" x 6" collection and they are matted with pink and white cardstock. I stamped the sentiment onto a Booktab die cut with Archival black ink. To embellish I've adhered some Prima White Petal Trim, some die cut Leaves and die cut Cherry Blossons. In the centre of the cherry blossoms I applied pink Liquid Pearls. 

Thanks for dropping by today and please do check back tomorrow when we will be debuting the DT kit for July ;)

Happy crafting!
Sandie
xXx

Sunday, June 15, 2014

Clean and Simple Card Set

Good morning. It's Sandie here and today I have a couple of CAS cards to share, using products from the June kit. 


Both cards are C6 and use white carstock bases. I cut 2 panels at 100mm x 143mm, one for the front panel on each card. On both I added some modelling paste through the TCW 6x6 Harlequin stencil. 


Whilst the paste dried I cut some strips of paper from the Basic Grey Highline 6x6 paper pad and fishtailed them to make pennants. I adhered 2 of the pennants with 3D foam tape and then adhered the 3rd penant directly onto them using wet glue. 

I used the Jillibean Soup Wise Word stickers to add the sentiments, arrow and silhouette to both cards. 


Products Used
White Cardstock
TCW Harlequin Stencil

Sandie
xXx


Thursday, June 5, 2014

Altered Book Box

Hello!! It's Sandie here and today I have an altered Wooden Book Box to share. 


I painted the whole box with white acrylic paint and quickly dried it with my heat gun. Then I applied a layer of  Crackle Medium. Once that dried I applied another layer of white paint and waited for the crackle medium to work it's magic. Once it had all dried I distressed all of the edges with Brushed Corduroy ink. 


I stamped out the Kaisercraft sentiment onto some Prima patterned paper. 


I embellished the box with Prima Flowers & Vines, shabby chic resin Railing and some pearls. I also added metal corners, a Tim Holtz Curio Knob and a metal charm which reads MOMENTS, all of which were in my stash. 


Sandie
xXx